Manage data and configure workflow execution related settings, manage accounts and connections used in the workflow, understand what a container is and how to select the container size, and add or delete workflow parameters.
Every single workflow has its own Workflow Settings panel. To access the Workflow Settings panel, navigate to the top-right corner of the canvas and click on the Settings icon. From the Workflow Settings window that appears, you can manage important settings of your workflow.
Let’s look at the various sections of the Workflow Settings panel in detail.
Accounts
No subtopics in this section
Under ACCOUNTS, you will see a list of all the accounts being used in that particular workflow.
Under each account name, you will see the names of actions that are currently using that account. Deleting an account from the Workflow Settings panel only removes it from that particular workflow; it will continue to be available in other workflows in which it is being used. Learn more about Accounts.
Parameters
No subtopics in this section
The PARAMETERS section displays the list of all project parameters that are being used in the workflow. From here, you can create a new parameter or update an existing one directly. Read more about Parameters.
From here, you can change the following settings related to the execution of your workflow:
Maximum workflow runtime
Specify the time after which the workflow execution should be terminated. The maximum workflow runtime limit is 6 minutes for sync workflows and 90 minutes for async workflows. The higher the runtime, the greater the credit/transaction consumption.
Note: Click here for detailed information on the credit/transaction consumption criteria.
Auto connect
You can automatically connect each connector added on canvas to a previous component (trigger or action, based on the workflow design) in the workflow. This eliminates the need for you to manually connect each connector to the workflow.
Show real-time visualization of workflow when executed via webhook or trigger
Enable or disable real-time visualization of workflow execution.
When it is enabled, you see real-time execution indicators on your canvas (a green line when you run the workflow), whenever you execute the workflow through a trigger or a webhook. When disabled, the real-time visualization line is not displayed for workflows running on webhooks or triggers.
You can see the real-time visualization line for all manually executed workflows at all times.
Notes:
This option is disabled by default for all the existing and newly created workflows.
If a workflow canvas remains idle for 15 minutes, and after that the workflow on that canvas is executed via webhook or trigger, you won’t be able to view the execution indicators. To resume viewing the execution indicators, either refresh the canvas page or execute the workflow manually once.
Retry executing failed actions 3 times before throwing an error
Enable this option to inform webMethods.io Integration to execute the failed action two more times, before throwing an error. This eliminates the need to re-execute the workflow each time it fails due to a momentary internal or external error in action execution.
Save status of each successfully executed action
Enable this option to save the status of each successfully executed action of your workflow. So, in case the workflow fails due to an error, you can resume workflow execution right from the point it failed. This is useful when you are working with complex workflow containing several actions.
Maintain workflow execution logs when executed via webhook or trigger
In Workflow Settings, the Maintain workflow execution logs when executed via webhook or trigger option is unchecked by default.
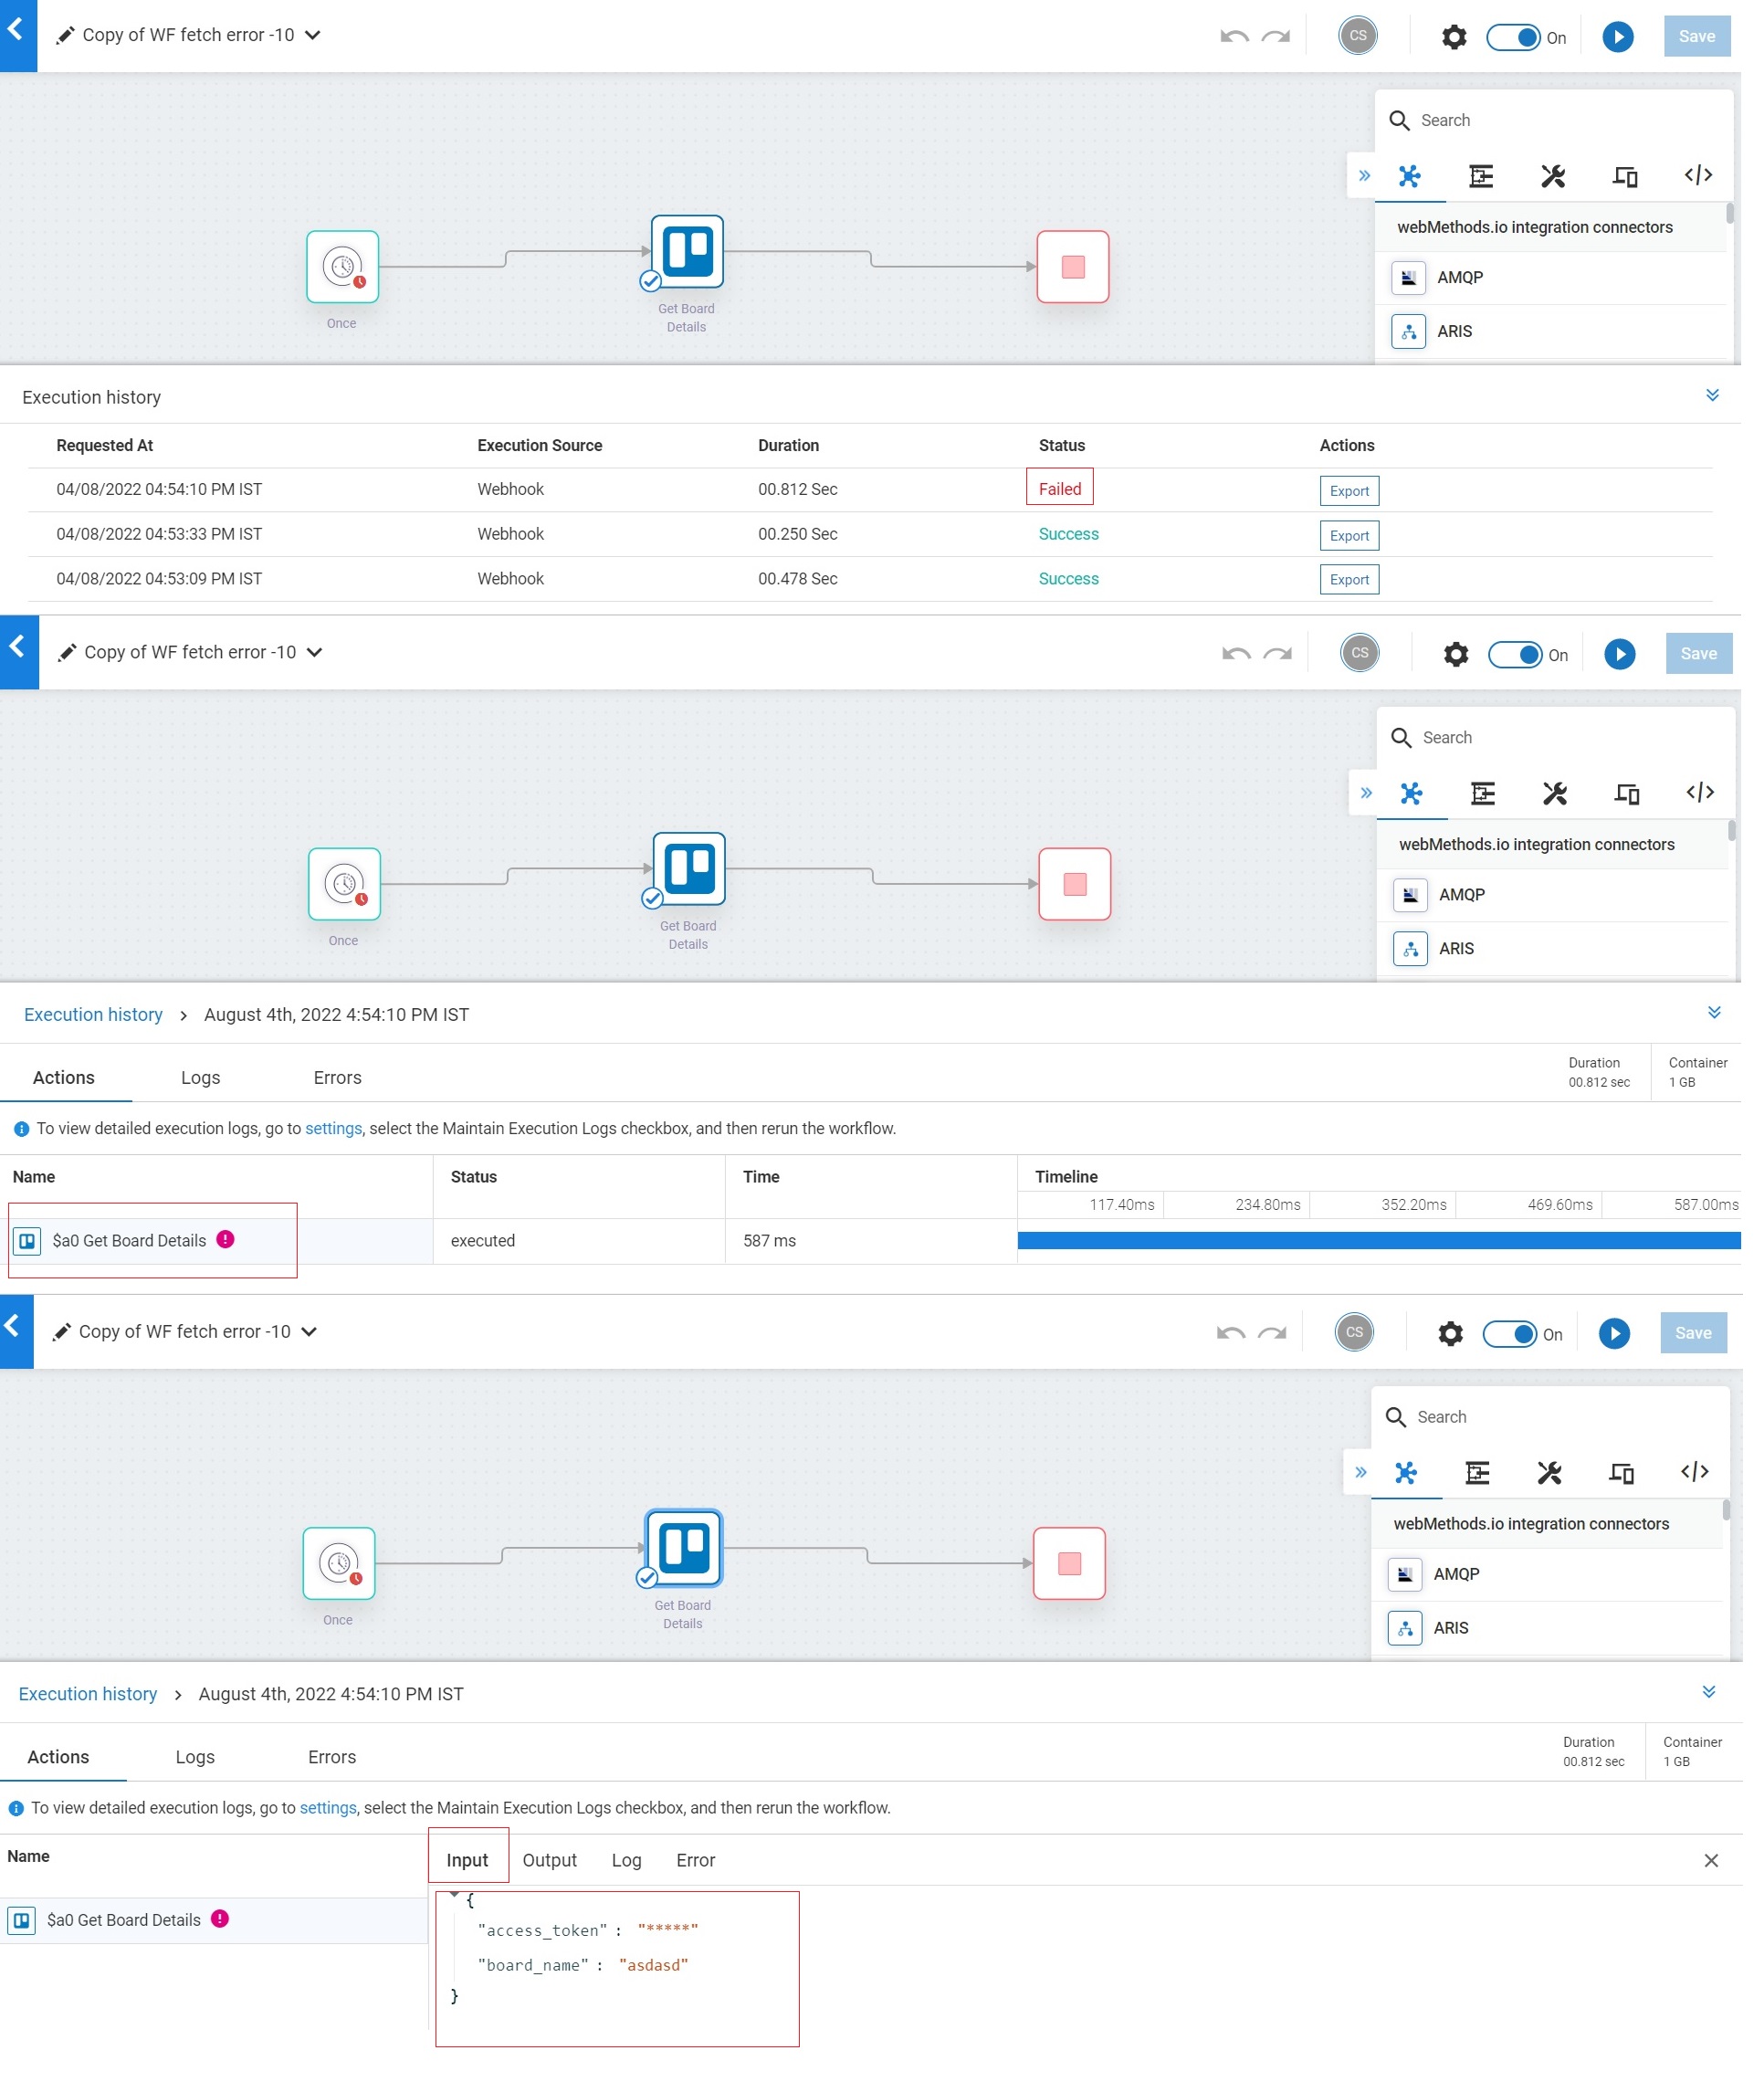
To view the input/output details associated with each action of the workflow in the debug panel as well as under the workflow execution logs, go to Workflow > Settings > Execution Settings and select the Maintain workflow execution logs when executed via webhook or trigger option. This setting is applicable to custom, cloned, as well as imported workflows. Once selected, the details are available in the debug panel for each action.
Additional Information
Workflow executed by webhook or trigger
If you have selected the Maintain workflow execution logs when executed via webhook or trigger option, you can view the workflow execution logs and the input/output details associated with each action of the workflow in the debug panel.
If you have not selected the Maintain workflow execution logs when executed via webhook or trigger option, you can only view the action log with the input details and the error message associated with the failed or timed out event of the workflow in the debug panel, as well as under the workflow execution logs.
Workflow executed manually from canvas
On manual execution of a workflow from the canvas, the execution logs will always be seen, whether the option Maintain workflow execution logs when executed via webhook or trigger is checked or unchecked in Workflow Settings.
Container
No subtopics in this section
A container is an isolated run-time environment. It contains all the dependencies (configuration files, binaries, system libraries, code, and so on) that it needs to run your workflows smoothly. Due to this container, the differences in OS distributions as well as underlying infrastructure are eliminated. This allows webMethods.io Integration to run on all the systems in a standard manner.
The size of the container determines the execution speed of your workflows. The bigger the size, the better the speed.
Note: The option to select the container size is only applicable for credit based tenants that are created before June 10, 2020 and will continue to run on credits.