Get to know the webMethods.io Integration dashboard from where you can create and manage projects, monitor tenant activities, navigate to recipes, switch between environments and apps, see account notifications, and manage your profile and settings with ease.
Components
No subtopics in this section
Before you start with creating custom Workflows and Flow services, let’s first get you familiarized with the webMethods.io Integration GUI. webMethods.io Integration home screen is the first screen that you will see after logging in to your tenant. The home screen is the best way to get an overview of your tenant and overall usage.
Here are the main components that make up the webMethods.io Integration home screen:
Navigation Tabs
Projects
Monitor
Recipes
Environment Name
App Switcher
Documentation
Notifications
Profile and Settings
Projects
No subtopics in this section
A project corresponds to a folder or container for organizing your assets. For example, when you create a Workflow or a Flow service inside a project, all the configurations related to that Workflow or Flow service are also stored inside the project.
Every tenant, by default, has a default project. You can choose to create additional projects as per your requirements.
When you login to webMethods.io Integration, you are redirected to the Projects screen by default. All projects created under your tenant are listed on this screen.
Default: webMethods.io Integration provides you a Default project in which you can start creating Workflows or Flow services right away.
New Project: Click on the icon to create a new project.
For every project, a card displaying a few details of that project appears on the Projects screen. Let’s see what they are:
Icons: Icons associated with the connectors being used in the project Workflows or Flow services.
Project Name: Name of the project. You can change this name by clicking on the vertical ellipsis icon given beside the project name and selecting the Edit option.
Number of Workflows and Number of Flow services: Number of Workflows and Flow services created under the project.
You can edit or delete any project (except the Default project) by clicking on the vertical ellipsis icon and selecting the Edit or Delete option. Further, you can publish any project by clicking on the vertical ellipsis icon and selecting the Publish Project option.
The Monitor page allows you to track and monitor tenant activities using execution results, create and manage alert rules, see Audit Logs, view the current month’s transaction usage, view all activities performed by the users, and display an overview of the SAP® ERP performance and SAP® ERP connection pools.
Recipes
No subtopics in this section
Recipes are pre-built templates based on the most common integration needs and can significantly reduce the effort required to build a Workflow or a Flow service.
You can preview and use Workflow and Flow service recipes for your project by using the Recipes feature.
Each webMethods.io Integration tenant comes with a Default environment, which can be used to create projects and add Flow services and Workflows in it.
You can register new environments and view, switch, and manage existing environments from your tenant home page.
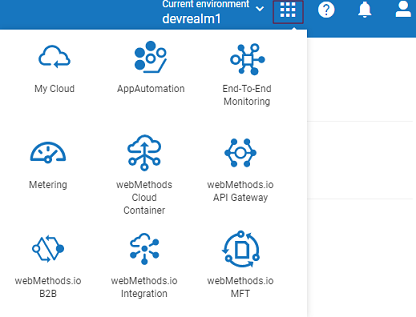
The App Switcher allows you to switch from the webMethods.io Integration platform to other applications including My Cloud with a single click.
Documentation
No subtopics in this section
Click on the question-mark icon to view the following:
About: Product version with the link to view the release readme, information on how to contact Software AG Global Support, Copyright Information, Imprint - Contact and Regulatory Information, and Privacy policy.
Getting Started: Single location where you will find links to trainings, tutorials, and webinars.
Documentation: Latest product help.
Support: Support services on Software AG Empower Portal.
Notifications
No subtopics in this section
Clicking the notification icon will display the list of recent notifications related to your tenant workflows. New notifications are indicated by a red dot on the top of the notification icon.
Profile and Settings
No subtopics in this section
You can view your profile information, manage settings and log out by clicking on the profile icon located at the top-right corner of the home screen. From here, you can do the following:
Profile: View your profile information. Go to My Cloud using the App Switcher to edit the details.
User management: Get a quick overview of roles assigned to a user, create, edit, and remove roles, and assign roles to users. The User Management option is available for tenant administrators (Admin role).
Settings: Configure tenant and user certificates and two-way SSL security modes, Data Dictionary Cache and Transaction Store, configure OAuth 2.0, configure your tenant preferences, and apply white labeling on your tenant as per your company brand identity.


 icon to create a new project.